

How to Use Minecraft Skin Editor in Browser - Step-by-Step Guide
A browser-based Minecraft skin editor lets you create, upload and customize a Minecraft character without installing additional software. You can paint directly on a 3D model, edit individual pixels in a 2D texture grid, switch between Classic and Slim models, work with separate skin layers and download the finished design as a PNG file.
This first part explains the desktop editor interface and the settings you should understand before drawing. Part 2 will cover the complete editing process, including painting, color matching, mirror mode, shading, transparency, uploading existing skins and downloading the finished file.
Want to create a starting design automatically? Try the AI Photo to Skin tool, Image to Minecraft Skin converter or Text to Skin AI generator, then open the generated skin in the editor for manual improvements.
What Is a Minecraft Skin Editor?
A Minecraft skin editor is a specialized pixel editor built around the layout of a Minecraft character texture. Unlike a normal image editor, it understands which pixels belong to the head, body, arms, legs and outer clothing layer.
The editor connects a flat skin texture to a live 3D character. When you draw on the model, the corresponding pixels change in the texture file. When you edit the texture in 2D mode, the changes immediately appear on the 3D preview.
This makes the editor suitable for beginners and experienced skin creators. Beginners can paint directly on the character without memorizing the full texture layout, while advanced users can use the 2D grid for precise pixel placement and detailed corrections.
What You Can Do with the Browser Editor
- Create a Minecraft skin from a blank or existing design.
- Upload a compatible Minecraft skin PNG.
- Paint directly on a rotatable 3D character.
- Edit individual pixels in a flat 2D texture view.
- Switch between Classic and Slim arm formats.
- Edit the base and overlay layers separately.
- Use Draw, Pick, Fill, Move and Erase tools.
- Choose exact colors using HEX codes.
- Download the completed skin as a PNG file.
Why Use a Minecraft Skin Editor in Your Browser?
A browser editor provides a fast way to customize a Minecraft skin without installing a graphics program. The workspace is already organized around Minecraft body parts, skin layers, player models and texture dimensions.
It is especially useful when you need to fix a small detail, recolor an outfit, add an accessory or inspect a downloaded skin before using it. You can upload the file, make pixel-level changes and save the corrected PNG from the same interface.
| Feature | Browser Skin Editor | General Image Editor |
|---|---|---|
| Installation | Runs directly in a web browser | May require separate software |
| 3D preview | Built into the editor | Usually unavailable |
| Body-part mapping | Organized into head, body, arms and legs | Displayed as one flat image |
| Base and overlay layers | Can be selected separately | Must be identified manually |
| Classic and Slim models | Selectable inside the editor | Requires manual texture knowledge |
| Best use | Creating and correcting Minecraft skins | General image processing |
When Manual Skin Editing Is the Best Option
Use the browser editor when you want complete control over individual pixels. Manual editing is ideal for adjusting facial details, changing colors, fixing uneven edges, creating custom clothing or checking every side of the character.
When an AI Tool Is Faster
Manual pixel art can take time when you are starting from a photograph, illustration or written character idea. In that case, create the first version with the AI Photo to Skin tool, Image to Minecraft Skin converter or Text to Skin AI generator.
You can then upload the generated result into the browser editor to correct individual pixels, improve the colors, refine the face or add custom clothing details.
For direct texture editing, you can also use the dedicated 64×64 Minecraft Skin Editor or 128×128 Minecraft Skin Editor, depending on the format required by your skin and intended platform.
Understanding the Minecraft Skin Editor Interface
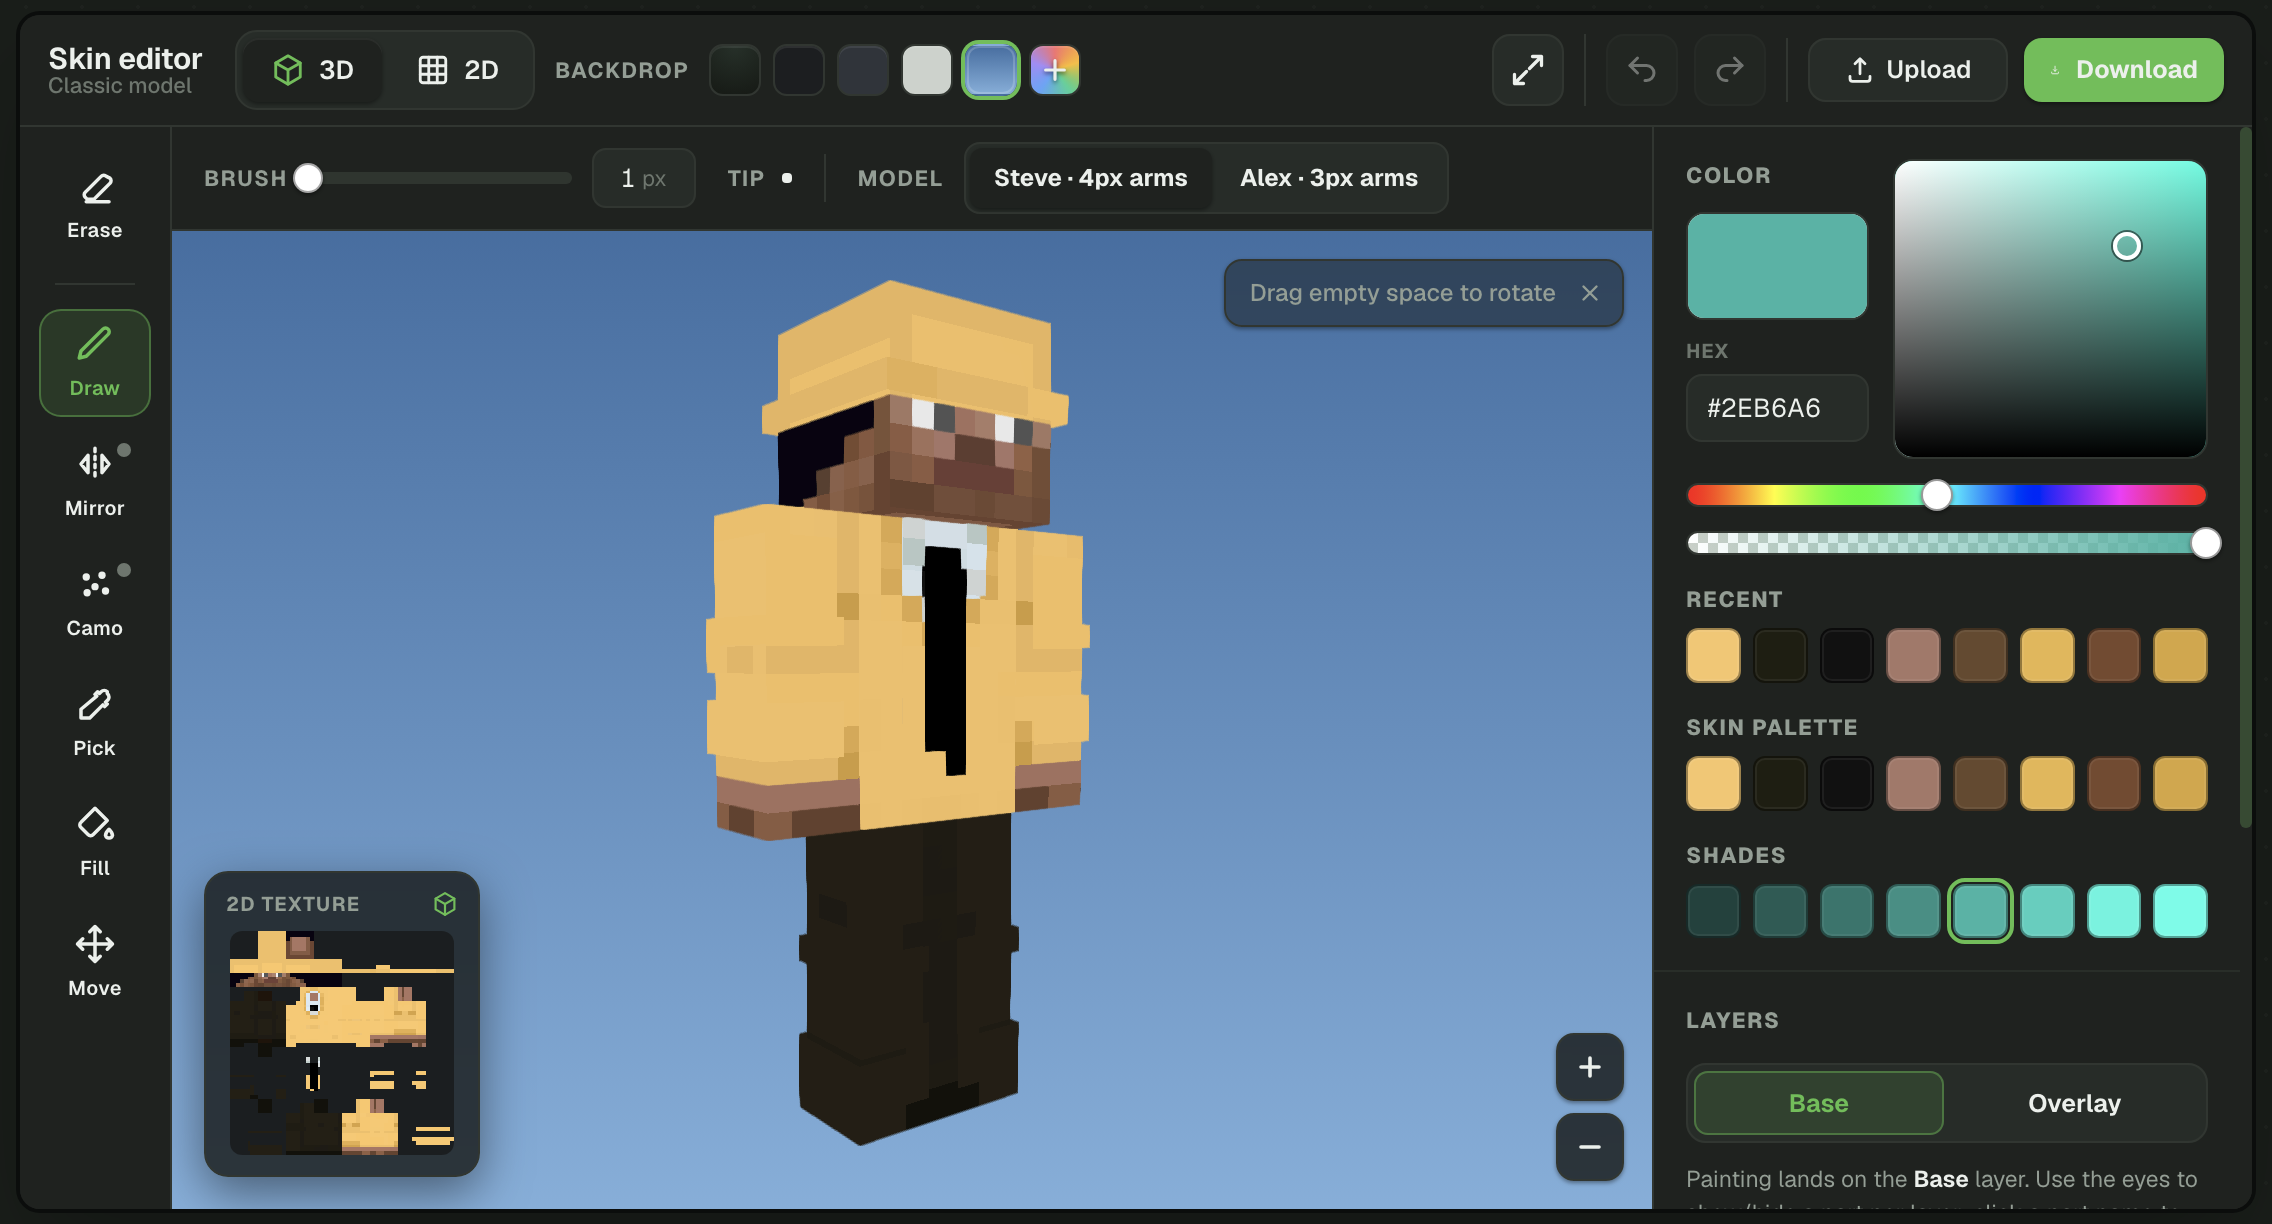
The desktop editor is divided into several connected areas. Each section controls a different part of the editing process, but every change is applied to the same Minecraft skin texture.
- Left toolbar: Contains Draw, Pick, Fill, Move and Erase.
- Top toolbar: Contains 3D and 2D mode, Mirror, brush size, fullscreen, undo, redo, Upload and Download.
- Main workspace: Displays either the interactive 3D model or the flat 2D skin texture.
- Preview window: Shows the 2D texture while working in 3D, or the live 3D model while working in 2D.
- Right sidebar: Contains colors, layers, body-part controls, model selection and backdrop settings.
How to Use the Left Editing Toolbar
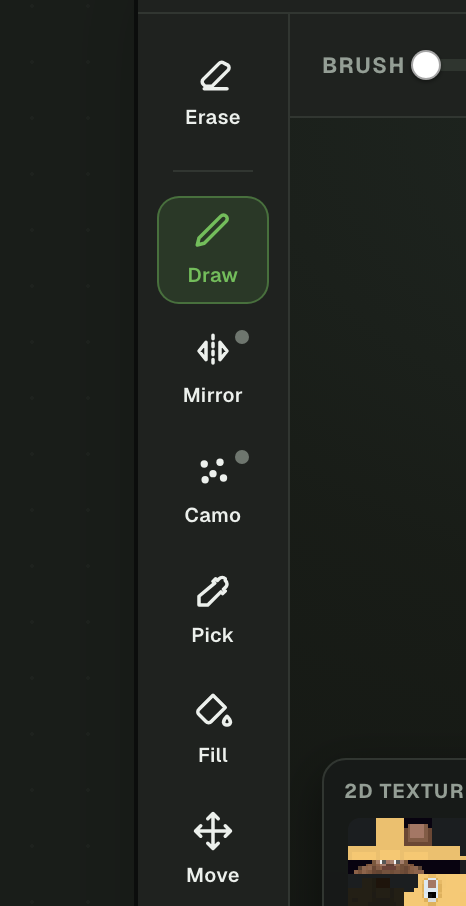
The vertical toolbar on the left contains the main tools used to change the skin. Only one tool is active at a time. The selected tool is highlighted so you can confirm what will happen when you click or drag across the model.
Draw Tool
The Draw tool paints the selected color onto the skin. In 3D mode, you draw directly on the visible surfaces of the character. In 2D mode, you paint on the flat texture grid.
Use Draw for facial features, clothing patterns, outlines, highlights, shadows and small corrections. A one-pixel brush provides the most control for detailed skin editing.
Mirror
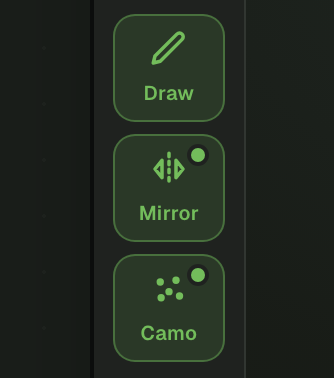
Mirror is a paint modifier rather than a separate tool. With it on, every stroke is repeated on the opposite side of the model, so symmetrical details — sleeves, gloves, shoes and trouser legs — stay matched without drawing each side by hand. Turn it off before adding anything one-sided, such as a badge or a scar.
Camo
Camo is another modifier for the Draw tool. When it is enabled, each painted pixel is randomly lightened or darkened around the current color, laying down a natural speckle instead of a flat fill. It is a quick way to add texture and variation to hair, fabric, wood or foliage.
Pick Tool
The Pick tool samples a color that already exists on the skin. After selecting a pixel, that exact color becomes the active drawing color.
This is useful when editing an existing design because you can match its original palette without guessing the color or manually entering a HEX value.
Fill Tool
The Fill tool replaces a connected area of matching pixels with the selected color. It is faster than drawing over a large area one pixel at a time.
Check the active layer and the boundaries of the selected area before using Fill. If several pixels are connected by the same color, the tool may recolor more of the texture than expected.
Move Tool
The Move tool lets you rotate and inspect the 3D model without painting it. Use it to view the front, back, sides, top and underside of the character.
Rotate the skin regularly while editing. A design that appears complete from the front may still contain unfinished pixels on the back of the head, inside the arms or underneath the feet.
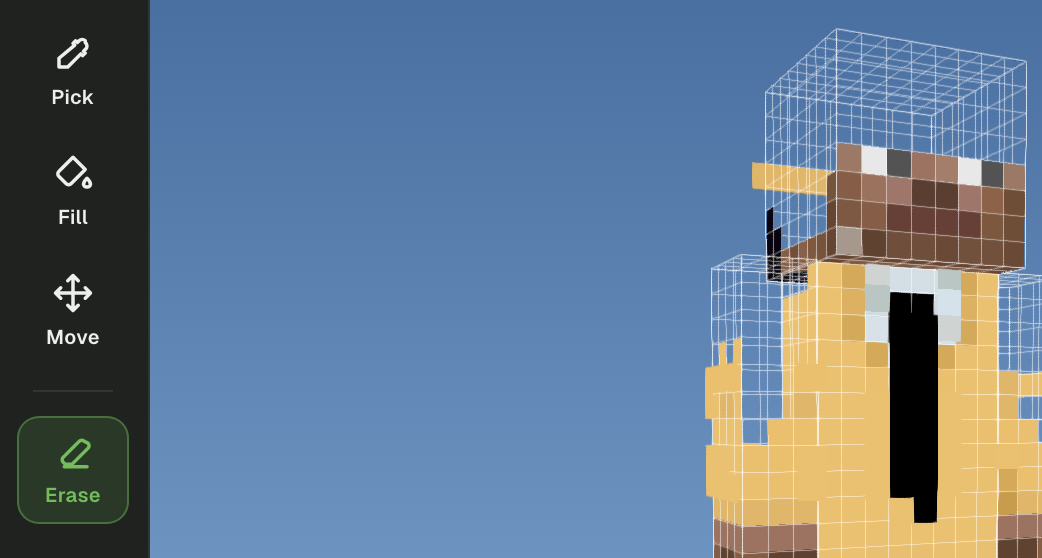
Erase Tool
The Erase tool removes pixels from the selected area. It is particularly useful for cleaning the overlay layer because erased overlay pixels become transparent and reveal the base texture underneath.
Be careful when erasing the base layer. Unwanted transparent areas can produce missing or incorrectly displayed parts of the skin.
Beginner tip: Use Move to position the character, Draw to add pixels, Pick to reuse existing colors and Erase to clean mistakes. Use Fill only after checking the selected layer.
Understanding the Top Toolbar
The top controls determine how the active tool behaves and provide access to the main view and file actions. Some options may change depending on whether you are working in 3D or 2D mode.

| Control | What It Does | When to Use It |
|---|---|---|
| 3D | Displays the skin on an interactive character model | Use it to paint naturally and inspect the complete character |
| 2D | Displays the complete skin as a flat texture | Use it for precise pixel placement and texture correction |
| Backdrop | Changes the scene color behind the model | Use it to get a clearer view of colors while painting |
| Brush size | Changes the area affected by each drawing action | Use a small brush for details and a larger brush for broad areas |
| Model | Switches between the Classic (4px arms) and Slim (3px arms) body | Match it to the format of the skin you are editing |
| Undo | Reverses the most recent action | Use it immediately after an accidental change |
| Redo | Restores an action that was undone | Use it when you undo a correct change by mistake |
| Fullscreen | Expands the editor workspace | Use it for detailed desktop editing |
| Upload | Loads an existing Minecraft skin PNG | Use it to edit, recolor or repair a skin |
| Download | Saves the edited skin as a PNG file | Use it after checking all sides and layers |
How the Color Palette Works
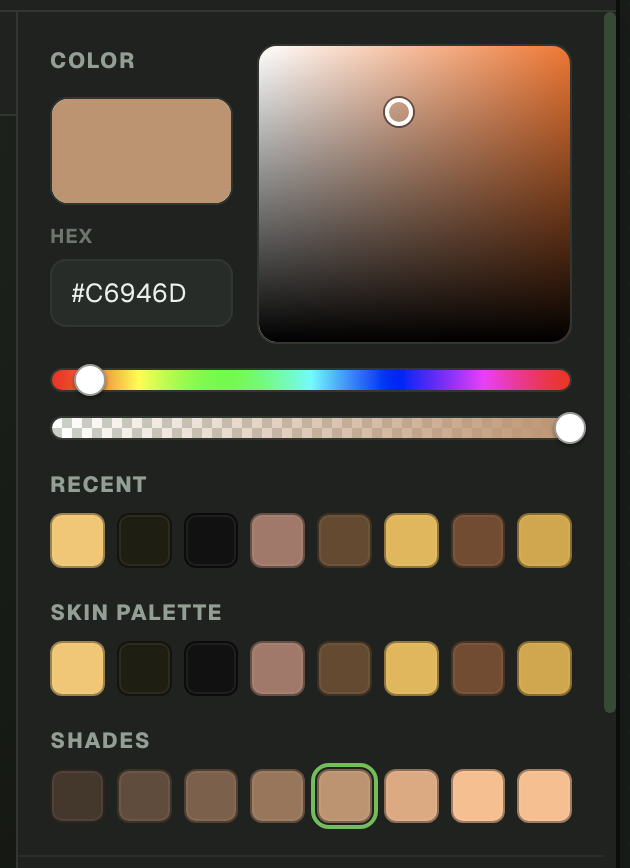
The color panel controls the active color used by the Draw and Fill tools. It includes a visual color field, hue selector, transparency control, HEX input and three swatch rows — Recent, Skin palette and Shades — for quickly reusing colors.
Visual Color Field
The large color field adjusts the brightness and saturation of the selected hue. Moving the selector toward the top creates lighter colors, while moving it downward creates darker shades.
Use related shades of the same base color for highlights and shadows. This usually produces a cleaner result than selecting unrelated light and dark colors.
Hue Slider
The rainbow slider changes the main color family. Use it to move between red, orange, yellow, green, cyan, blue, violet and pink before refining the shade in the main color field.
HEX Color Input
The HEX field lets you enter an exact color value. It is useful when following a predefined palette, matching a brand color or reusing the same colors across multiple skins.
Transparency Control
Transparency is primarily useful when working with the overlay layer. Transparent pixels allow the base skin to remain visible where no hat, jacket, sleeve or raised detail should appear.
Important: Check the transparency setting before drawing. A partially transparent color may appear faded, while a fully transparent pixel may appear as if nothing was painted.
Recent Colors
The Recent row keeps the colors you have just used so you can jump back to them without re-picking. When you first open a skin it is seeded from that skin's own colors.
Skin Palette
Skin palette is sampled from the skin you are editing — the dominant colors already present in the texture. It makes it easy to keep new edits consistent with the existing design.
Shades
Shades shows a ramp of lighter and darker versions of the current color. Use it to pick natural highlights and shadows from the same base color instead of pure black and white, which usually looks flat in Minecraft pixel art.
Base Layer vs Overlay Layer
A modern Minecraft skin contains two visual layers. The base layer forms the character’s main surface, while the overlay adds a second outer shell around selected body parts.
Understanding these layers is essential. Painting on the wrong one can cause details to disappear, produce unwanted transparency or make clothing look thicker than intended.
| Layer | Typical Content | Recommended Use |
|---|---|---|
| Base | Face, skin, basic hair, shirt, trousers, shoes and permanent details | Use it for the main design that should always remain visible |
| Overlay | Hat, outer hair, jacket, sleeves, cuffs and raised accessories | Use it for details that sit above the base texture |
The Base Layer
The base layer contains the character’s primary appearance. If you hide the overlay, the base is the texture that remains visible.
Faces, main hair, shirts, trousers and shoes should normally have a complete base design. Even when you plan to add a jacket or hat, the texture underneath should still be intentionally designed.
The Overlay Layer
The overlay sits slightly above the base model. It is commonly used for hats, raised hair, jackets, coat edges, sleeves, cuffs and decorative clothing details.
Use the overlay selectively. Covering every surface with a solid outer layer can make the skin appear bulky and may hide the shading underneath.
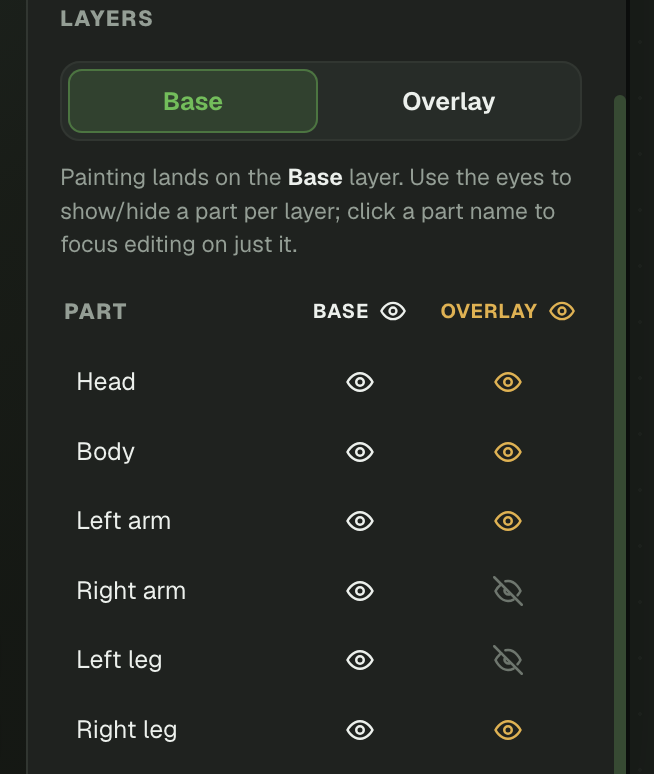
Editing Individual Body Parts
The layer panel separates the character into the head, body, left arm, right arm, left leg and right leg. Selecting an individual part helps you focus on a specific area and reduces the chance of editing a nearby surface by mistake.
The eye icons control visibility. Hiding an overlay section reveals the base underneath, while hiding selected body parts can make difficult surfaces easier to inspect.
Best practice: Complete the main base design first. Add the overlay afterward for jackets, hats, sleeves, accessories and extra depth.
Classic vs Slim Minecraft Skin Models
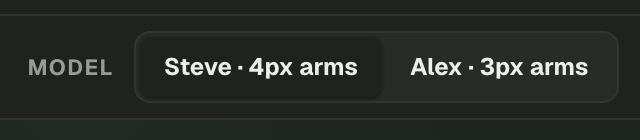
Minecraft skins generally use one of two player-model formats: Classic or Slim. The main technical difference is the width of the arms.
- Classic model: Uses four-pixel-wide arms and is commonly associated with Steve.
- Slim model: Uses three-pixel-wide arms and is commonly associated with Alex.
| Model | Arm Width | Common Name | Choose It When |
|---|---|---|---|
| Classic | 4 pixels | Steve model | The skin uses the wider arm texture layout |
| Slim | 3 pixels | Alex model | The skin uses the narrower arm texture layout |
How to Choose the Correct Model
When uploading an existing skin, switch between Classic and Slim and inspect both arms from the front, side and back. The correct model should display the sleeve edges cleanly without missing strips, duplicated pixels or compressed details.
When creating a new skin, select the model before drawing detailed sleeves, gloves or arm patterns. Changing the arm format later may require manual corrections.
Common mistake: Classic and Slim describe the arm texture layout, not whether the character should look masculine, feminine, wide or narrow.
2D Mode vs 3D Mode
The editor provides two ways to work on the same skin. The 3D mode is easier for understanding how the texture wraps around the character, while the 2D mode gives you direct access to the complete pixel grid.
| Editing Task | Recommended Mode | Reason |
|---|---|---|
| Creating the main outfit | 3D | You can see the result directly on the character |
| Checking the back and sides | 3D | The model can be rotated from every angle |
| Placing individual pixels | 2D | The grid provides exact pixel access |
| Fixing texture seams | 2D and 3D | Edit precisely in 2D, then verify the wrapped result in 3D |
| Reviewing overlay alignment | 3D | The raised layer is easier to inspect on the model |
| Editing a specific texture face | 2D | Labeled regions make individual surfaces easier to locate |
Working in 3D Mode
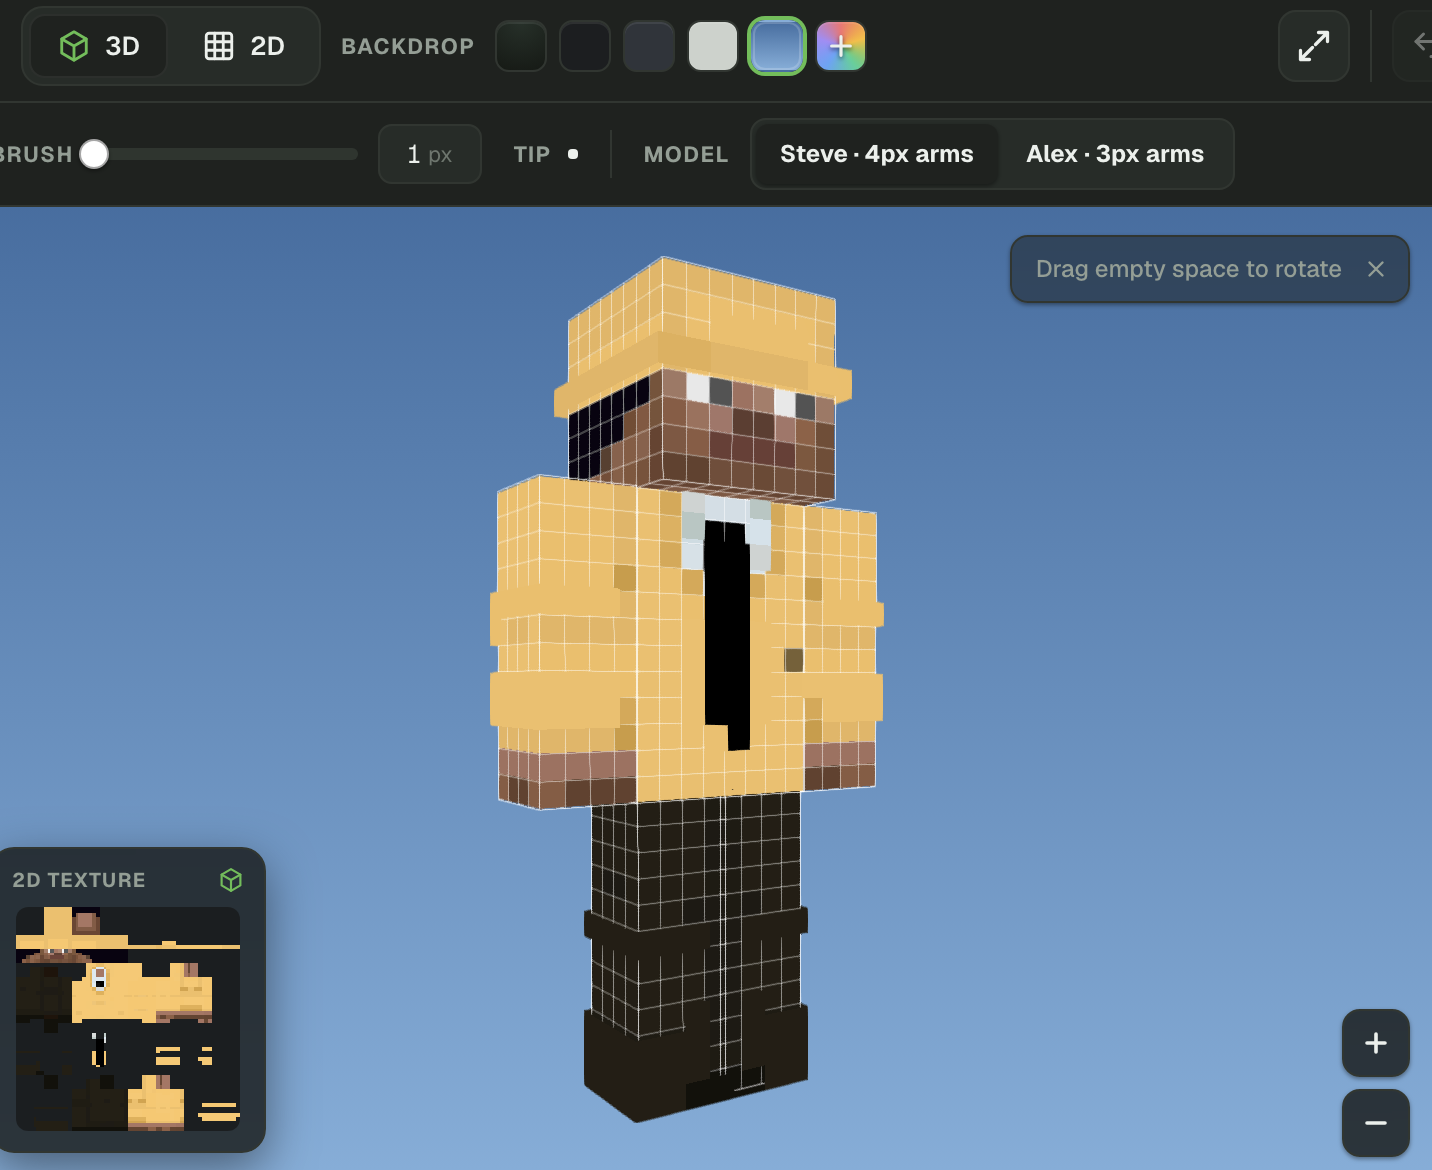
In 3D mode, the skin is wrapped around an interactive Minecraft character. You can draw on visible surfaces, rotate the model and zoom in or out.
This mode is best for checking proportions, clothing alignment and how colors connect around corners. A small 2D texture preview remains visible so you can see how your edits affect the actual PNG layout.
Working in 2D Mode
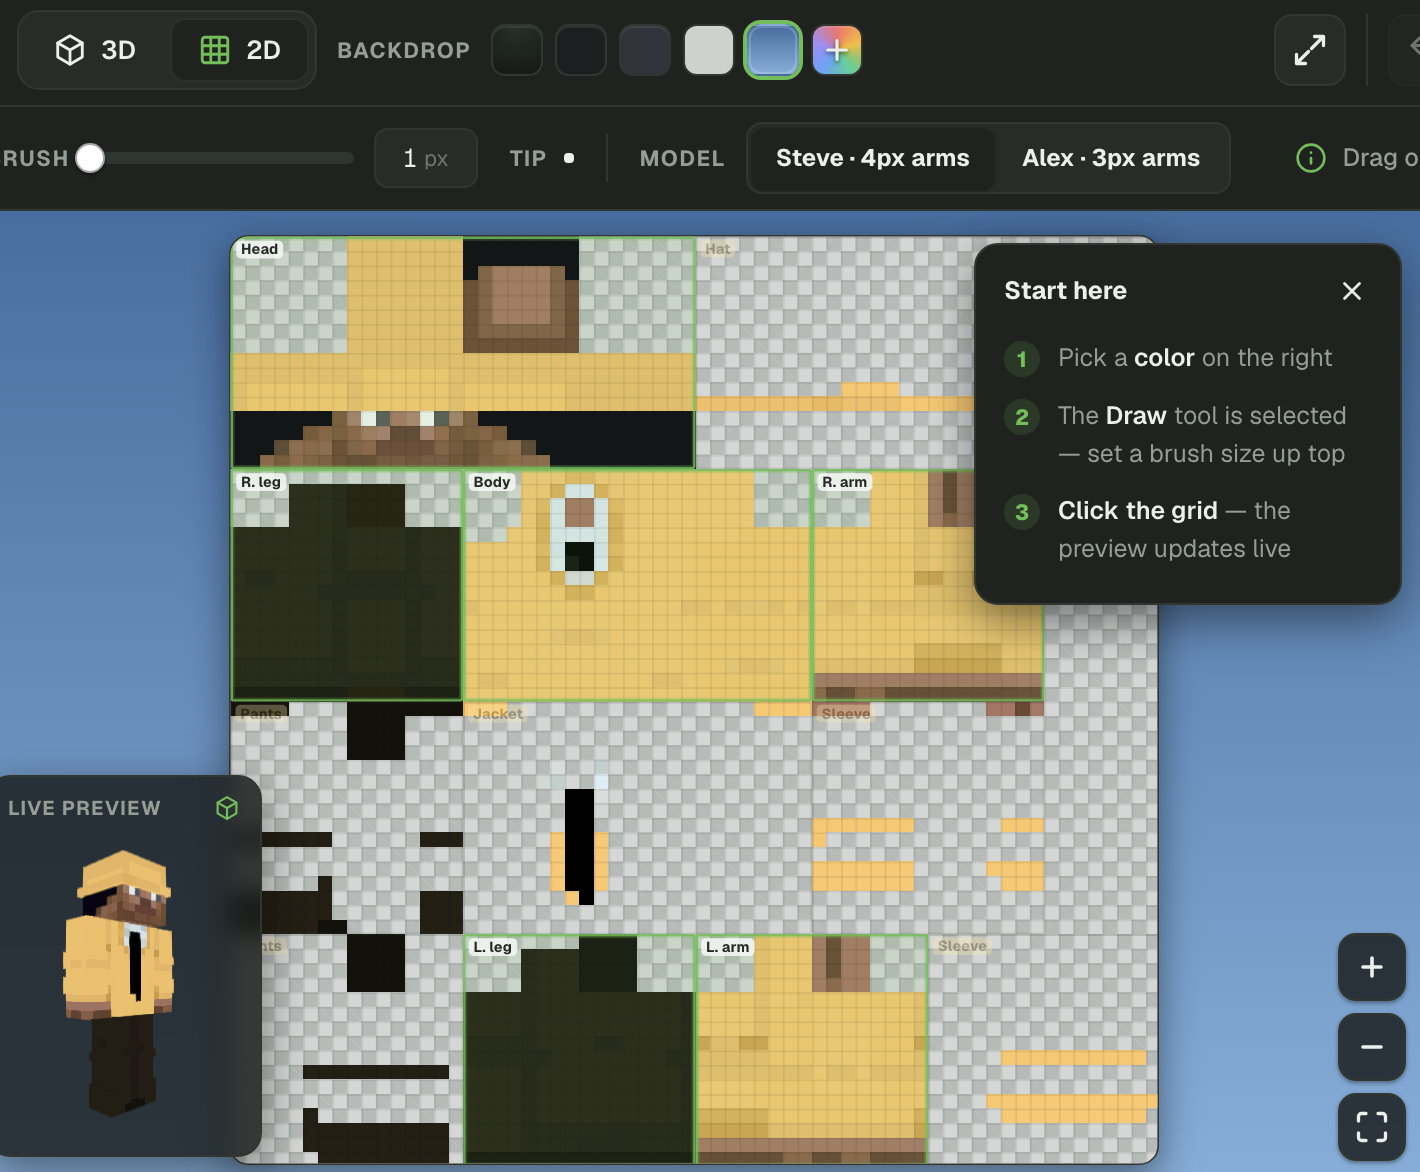
In 2D mode, the full skin texture is unfolded into a flat grid. Separate regions correspond to the different faces of the head, body, arms, legs and overlay.
The 2D view is more precise but requires more awareness of the texture layout. Body-part labels help identify the area being edited, while the live 3D preview shows how those pixels appear on the character.
Why the Best Workflow Uses Both Modes
Do not treat 2D and 3D as competing options. A reliable workflow moves between both views. Use 3D to create and inspect the character, then switch to 2D to repair individual pixels, edges and texture seams.
After making a precise correction in 2D, return to the 3D view to confirm that the edited area wraps correctly around the model.
Choosing a Backdrop
The backdrop changes the scene behind the character without changing the skin itself. Its purpose is to improve visibility while you edit.
Choose a background that contrasts with the dominant colors in the skin. A dark background makes pale clothing and white pixels easier to see, while a light or blue backdrop can reveal problems in black hair, dark trousers and transparent overlay areas.
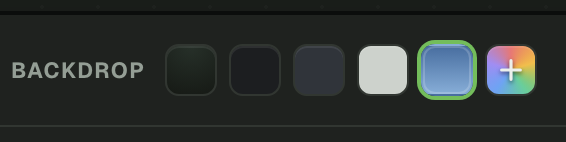
Visibility check: Change the backdrop at least once before downloading. Missing pixels and rough edges that blend into one background may become obvious against another.
How to Prepare the Editor Before Drawing
Complete these setup steps before beginning detailed work. They reduce the chance of editing the wrong model, body part or layer.
- Open the online editor. Launch the Minecraft Skin Editor on a desktop or laptop browser. Use fullscreen mode when you need more space.
- Upload an existing skin or use the current design. Select Upload to edit a compatible PNG. You can also upload a skin created with the AI Photo to Skin tool, Image to Skin converter or Text to Skin AI generator.
- Select Classic or Slim. Choose Classic for four-pixel arms or Slim for three-pixel arms.
- Select the Base layer. Start with the base when creating the face, main hair, shirt, trousers and shoes.
- Select a body part. Focus on the head, body, arm or leg when you need to edit a specific section.
- Choose a contrasting backdrop. Use a background that makes the skin edges easy to distinguish.
- Set the brush to one pixel. A one-pixel brush provides the most control for facial details and precise corrections.
- Check Mirror mode. Enable it for symmetrical details and disable it for different left and right sides.
- Inspect the design in 2D and 3D. Check the texture layout and the wrapped character before making major changes.
Using the Minecraft Skin Editor on iPhone or iPad
This guide focuses on the desktop browser editor, where the wider workspace makes it easier to view the character, texture preview, color palette and layer controls at the same time.
For a touch-focused workflow, use the Minecraft Skin Editor app for iPhone and iPad. The mobile app provides tools for creating, previewing, editing and saving Minecraft skins directly on iOS and iPadOS devices.
Creating Realistic Minecraft Skin Shading
Flat colors make a skin look unfinished. Small shadows create the illusion of folds, depth and volume without changing the Minecraft model itself.
Good places for shadows include:
- Under the chin
- Inside sleeves
- Below jackets
- Under hats
- Between legs
- Inside shoes
- Hair edges
Highlights usually work best on:
- Shoulders
- Top of sleeves
- Top of shoes
- Hair
- Hat edges
Avoid using pure black and pure white. Instead, slightly darken or lighten the existing color.
Using the Erase Tool
The Erase tool removes pixels from the selected layer.
When working on the Overlay layer, erased pixels become transparent, revealing the Base layer underneath.
This is commonly used for:
- Removing jacket sections
- Cleaning hats
- Removing accidental sleeve pixels
- Creating transparent overlay effects
Downloading Your Finished Skin
When you're satisfied with the design, click Download to save the completed skin as a PNG file.
Before downloading, quickly check:
- Correct model selected
- Base layer finished
- Overlay finished
- Front checked
- Back checked
- Arms checked
- Legs checked
- Colors look consistent
- No accidental transparent pixels

Common Minecraft Skin Editing Mistakes
| Mistake | How to Fix It |
|---|---|
| Wrong player model | Switch between Classic and Slim. |
| Forgot back of skin | Rotate the character regularly. |
| Flat colors | Add highlights and shadows. |
| Editing wrong layer | Check Base or Overlay before painting. |
| Accidental transparency | Verify opacity before drawing. |
| Uneven sleeves | Use Mirror Mode or edit in 2D. |
Frequently Asked Questions About the Minecraft Skin Editor
How do I use a Minecraft Skin Editor in my browser?
Open the online Minecraft Skin Editor, choose the Classic or Slim player model, select the Base or Overlay layer and use the Draw tool to paint directly on the 3D character. Switch to 2D mode for precise pixel editing, inspect every side of the model and select Download when your skin is finished.
Can I edit a Minecraft skin online without downloading software?
Yes. The browser-based Minecraft Skin Editor works online, so you can create, upload and edit a skin without installing a desktop graphics program. Your editing tools, 3D preview, color palette, layers and download controls are available directly in the browser.
Is the online Minecraft Skin Editor free to use?
Yes. You can use the browser editor to draw, recolor, preview and download Minecraft skins. You can also use the 64×64 Minecraft Skin Editor or 128×128 Minecraft Skin Editor depending on the resolution of your skin.
Can I upload and edit an existing Minecraft skin?
Yes. Select Upload and choose a compatible Minecraft skin PNG from your device. After the file opens, you can change colors, repair missing pixels, modify clothing, edit the face, add an overlay and preview the updated skin in 3D.
How do I make a Minecraft skin from a photo?
Use the AI Photo to Skin tool to turn a photo into a Minecraft skin, then upload the generated PNG to the browser editor. Manual editing lets you improve the face, hair, clothes, colors and shading before downloading the final version.
Can I convert an image into a Minecraft skin?
Yes. The Image to Minecraft Skin converter creates a structured Minecraft skin from a reference image. Unlike ordinary pixelation, the result is mapped to the head, torso, arms and legs so it can be opened and refined in the skin editor.
Can AI generate a Minecraft skin from text?
Yes. Enter a description into the Text to Skin AI generator to create a character from a written prompt. You can describe the hairstyle, face, clothing, colors, theme and accessories, then edit the generated skin manually in the browser.
What is the difference between a 64×64 and 128×128 Minecraft skin?
A 64×64 skin uses the standard Minecraft skin texture size, while a 128×128 skin provides a higher-resolution canvas with more pixels for supported platforms and tools. Use the 64×64 skin editor for standard skins and the 128×128 skin editor when your target format supports higher-resolution textures.
Should I choose the Classic or Slim Minecraft skin model?
Choose Classic for four-pixel-wide arms and Slim for three-pixel-wide arms. Classic is commonly called the Steve model, while Slim is commonly called the Alex model. The correct option depends on the arm layout used by the skin texture, not the character’s gender or body type.
Why does my Minecraft skin look broken around the arms?
The wrong player model may be selected. Switch between Classic and Slim, then inspect the front, sides and back of both arms. A skin designed for three-pixel Slim arms may display missing or compressed pixels when shown on the four-pixel Classic model, and vice versa.
What is the difference between the Base and Overlay layers?
The Base layer contains the character’s main face, hair, body, shirt, trousers, arms, legs and shoes. The Overlay layer sits slightly above the base and is used for hats, jackets, outer hair, sleeves, cuffs and raised accessories.
Why is part of my Minecraft skin transparent?
Transparent pixels may have been added with the Erase tool or a transparent color setting. Transparency is normally useful on the Overlay layer, but missing pixels on the Base layer can make parts of the character display incorrectly. Check the active layer and opacity before painting.
Should I edit a Minecraft skin in 2D or 3D mode?
Use 3D mode to draw naturally on the character and check how the design wraps around the body. Use 2D mode for exact pixel placement, texture seams, facial details and difficult surfaces. The most effective workflow switches between both modes.
How do I rotate the Minecraft skin while editing?
Select the Move tool and drag the 3D model to inspect the front, back, sides, top and underside. Rotate the character regularly so you do not leave the back of the head, inner arms, sides of the legs or bottom of the shoes unfinished.
How does Mirror mode work in a Minecraft Skin Editor?
Mirror mode repeats compatible edits on the opposite side of the model. It is useful for symmetrical sleeves, gloves, shoes and trouser legs. Disable Mirror before adding details that should appear on only one side, such as a badge, scar or single accessory.
How do I shade a Minecraft skin?
Start with a main color, then create slightly darker and lighter versions of it. Add shadows under the hair, chin, sleeves, jacket and shoes, and place highlights on upper surfaces. Avoid relying only on pure black and white because softer hue and brightness changes usually produce better pixel-art shading.
How do I remove pixels from the Overlay layer?
Select the Overlay layer, choose the Erase tool and remove the unwanted pixels. The erased areas become transparent and reveal the Base layer underneath. This is useful for cleaning hats, jacket edges, sleeves and raised accessories.
How do I save and download my edited Minecraft skin?
Inspect the skin in 3D, verify the Classic or Slim model, check both layers and rotate the character to review every side. Select Download to save the completed Minecraft skin as a PNG file on your device.
Can I use the Minecraft Skin Editor on an iPhone or iPad?
Yes. For a touchscreen-focused workflow, use the Minecraft Skin Editor app for iPhone and iPad. The mobile app lets you create, edit, preview, save and manage Minecraft skins on iOS and iPadOS.
Why is my downloaded Minecraft skin not showing correctly?
Confirm that the skin was downloaded as a compatible PNG, that the correct Classic or Slim model is selected and that important Base-layer areas are not transparent. You should also verify that the skin resolution is supported by the platform where you plan to use it.
What is the fastest way to create a custom Minecraft skin?
The fastest workflow is to generate a starting design with the AI Photo to Skin tool, Image to Minecraft Skin converter or Text to Skin AI generator. Upload the result to the browser editor, correct the details and download the finished PNG.